Showing posts with label Diy. Show all posts

Wednesday, May 14, 2014

DIY Wedding Card Box

Weddings are expensive. It's one thing to say the average wedding costs $35k. It's another to live it. (Tho trust me, my budget is nowhere near that!)

Today we are going to explore an alternative.

Wedding card boxes are expensive. Whether you are looking at a traditional card box, wire bird cage, or something in-between... it's going to be $20 minimum for a 'nice' style. However, you can get something cheap- and cheap looking- for less than $10.

NO MORE I say! If you have a little time to spare and are crafty, you can get something way more unique and cheaper! Because I'm a DIY craft junkie, the only real out of pocket expense for me was the box itself. I could have stopped there, but why?!

Worst case scenario this is going to cost $20, for me it was just over $10 and took maybe an hour to do.

Materials:

-Large fake book storage box: at Michael's 40% off plus an additional 25% off coupon= less than $8!
-Hemp Twine- or string or whatever you have
-Scrapbook paper- if you don't have any laying around, look for alternatives (think of your theme-comic books maybe? or Michael's has specials all the time)
-Template
-Pencil
-Scissors
-Misc. embellishments- optional
-Di-cut Shiny Red Damask letters- previously purchased ~$3 (I've been holding onto these for the perfect wedding craft so I am including the cost here) or if you have a Kricut or something you could make your own

I don't want to spoil too much, so here is the incomplete card box!

The outside- fits our "Adventure theme" and colors.

Nice and roomy on the inside! Dare I say- BIGGER on the inside?

 The materials.

 The layout.- All I did was trace a template on the side of the scrapbook paper I didn't want to use (this way messy lines won't show) and cut 'em out. Then, hole punched two corners on each for my twine to string them up inside the book.

Not done, but you get the idea. The black/gold things in the corners are picture corners. I'm planning on hiding the end of the string with them. I also need to add the di-cut letters to spell out  C A R D S.


BONUS: the fiance loved the idea and picked out the book to use.Teamwork and collaboration.

So tell me- what crafty projects are you up to?! (Doesn't have to be wedding related!)

Wednesday, March 26, 2014

Simple Jewelry Fixes- DIY

Since I didn't got to MegaCon over the weekend, here's a quick Jewelry update:
 
The necklace on the [below] right I've had for ages. I didn't wear it often because it didn't lay properly. At over 3' long it wasn't working for me. I took off over 1.5' and now its an adorable bib-style necklace. This isn't the first necklace I've adjusted this way. Such a simple solution!
 
PS Don't discard the remaining links- use them again for another project another day!
 
Next up, a cheap looking, junky and chunky heart pendant. The cute crown tarnished but I held on to it to repurpose. Finally got around to it. The little pink deer is from a pair of earrings, sadly the earring hooks tarnished.


I pried the crown off easily, then sanded down the residue from the epoxy.

Finally, I stacked my pieces on top and super glued them into place.

 
And just like that, without spending a dime, using what I already had- I now have TWO "new" pieces of jewelry. *happy dance*
 
 
Tell me, what have you repurposed lately??

Tuesday, January 28, 2014

Wedding Theme- UP and UP

I literally squealed with delight when I saw this in the $1 bin at Target. The wedding is taking on an UP theme, not entirely intentional or unintentional.

 How perfectly adorable is this?! I think we will use our thumb prints instead of hand prints. I may have guests write messages and put them in the mailbox. Or use it for the Dollar Dance. So many options! I can't wait to get started on it.

For size reference:


I couldn't resist giving you all some insight to my absence lately. Been a little preoccupied. Also, have a big trip coming up next month!

So there you have it. Have  great week everyone!!!

Friday, December 27, 2013

Adorably Simple (and cheap) Gifts

How to make an adorable gift- great for many occasions, not just the holidays- with a few items. Here is what you need:
 
Small candle (These candle are from Bath and Body Works- on sale 3 for $10!)
Flat Snowflake ornament or tissue paper*
Washi Tape
Ribbon*
 
*(of which you probably have laying around- otherwise the Dollar $tore is your friend)
 
Here we Gooooo:
 
 Remove the string from the ornament. Remove the front label (don't worry it still tells you what scent the candle is on the bottom) and then wrap the washi tape around.
 
Like so:


Before, during and after progress shot.
 
Set the candle on top of the ornament and tie a ribbon around both to keep them in place.
OR fold a small piece of tissue paper around the candle and tie with a ribbon bow.
TADA- bonus, the ornament is now a cute little candle "holder."
 
And, wouldn't these even make cute favors?!

Thursday, December 19, 2013

DIY Holiday Cards

Now that my cards have been sent, I can share with you all my cards!

Inspired by this find on Pinterest I decided to make my own cards. Easier said than done, but I'm pleased with the results none-the-less.

The Original


What you need:
A Cup
A paint plate
Paint- greens or blue/yellow to mix
Something for the ribbon (I used sparkly paint)
Cards/cardstock
It took me forever in Michael's to find cardstock that I liked. I went in hoping to just get 5x7 cards- apparently those are hard to come by without envelopes. So in the end I decided on round cardstock- which I thought would be cute with round wreaths.


I opted for a simple hand written message on the back- I'll sign them all later....


I leave you with this message:


Soooo fellow crafters- whats on your holiday craft list?!


Monday, October 21, 2013

Go Picnic!

I discovered an amazing product on Groupon a while back- gopicnic. Everything you need for a quick and easy meal at your desk neatly packaged in a "picnic basket". Today, while at Target, I decided to make my own. Partially due to the fact that my Target only carries 3 varieties now and they are 2 for $7- on a good sale day. When not on sale- $3.99 a box!

Here is my shopping list:

Simply Balances Fruit Strips or Twists- $2.99 for a box of 10 or 6 ($0.50)
Archer Farms Multi Seed Crackers- $2.15- 4.5 servings ($0.53)
Archer Farms Raw Mixed Nuts- $5.00/bag on sale!- 6 servings/each (bag says 11 but I need more nuts!) ($0.83)

Sistema 2 compartment container- $5


I already had a jar of Motts Apple Sauce (~$3 and 11 servings) ($0.30) and Tupperware container (~$3).

**(prices before 5% Target card savings)**

Food costs alone- $13.14 OR $2.16 per meal. (If you want to get really technical its JUST over $2.00/serving with my Target card).

Not including my granola bar, aka camuppin, I take every day. And I think I need something to put on the crackers- peanut butter, honey, Laughing Cow mini cheeses...

I'll probably substitute crackers for pretzels some days or try different varieties of nuts and crackers. I think its a good start and worth the effort (I'm not going to do all the math, but there's way less Sodium in these individually versus the gopicnic).

Needless to say I'm excited for lunch tomorrow and hopefully its as delicious and filling as it looks!


Any suggestions? How do you pack a yummy, low effort lunch?


Monday, October 7, 2013

Post Wedding crafting

When the party is over, the bills are paid and everything is cleaned up... What do you do with all the remaining Stuff?! Well, the flower part is easy. Dry the flowers for display! I took my bouquet, chose the best of the wilted flowers and dried/pressed them.

To dry flowers, hand them upside down until they get that nice crisp/crunchy feel to them. I strung them up with some hemp rope. When they are nice and dry, generously spray with hairspray.

To press flowers, you will need lots of heavy books, preferably with shiny pages. The flowers tend to stick to paper pages. Layer the chosen ones in a few books, stack them under more heavy books (I even added a large ceramic vase to the top of the stack). And let sit for many days. This process worked well for the small yellow roses and a tall purple flower. The others got brownish and not very pretty.

I took my pressed flowers, a shadow box, scrapbook paper, glue dots and ribbon to make a display.
 
The dried flowers I put in a small vase.
 
They look quite nice with my Halloween décor, don't you think?
 
My apologize for the lack of progress pictures. As usual, I thought of it too late. Plus some of you demanded to see AFTER the fact. ;)
 
 
Anyone have any wedding crafts to share?!

Thursday, September 26, 2013

Its a Mad Mad Tea Party

For those of you who don't know, my brother got married! And I was asked by my lovely sister-in-lawto be Maid of Honor! Probably 1 of 2 times in my life I will get to do this, so I couldn't help myself and may have gone little overboard for the Bridal Shower. Months ago the Bride approached me with an Alice in Wonderland Bridal Shower Invitation. That's all I needed... one little idea to set the whole thing in motion. I've only attended 2 Bridal Showers, 1 Bachelorette Party and 2 or 3 Baby showers in my life. So I did what anyone would do, I went to the interwebs.

Bad idea! Do you even know how many ideas there are out there!? And me being me, I just can't contain myself! So if you find yourself throwing a themed shower/party here are some ideas I narrowed down after many Google searches and hours on Pintrest (not that I'm complaining!). See my bridal shower themed board here! Not all Alice themed, but many cute ideas if money and time were no object.

Theme:

Start with an overall/general theme. Being Alice in Wonderland Tea Party Scene- I went for anything floral/pastel/pretty. There is a lot you can do with that! It helps to try to think of an idea that will not cost you an arm and a leg, especially if you keep holiday decorations by the boxful (like I do), and if you have people you can rely on to help pull it all together (ie an Aunt who is willing to prepare food).

Table décor:

Hardcover/Vintage books- without the book jackets. We scoured Salvation Army/Thrift Shops/Etc for them. Beware: Goodwill is expensive for used/old books! We decided to pick out titles that went with the theme/love/marriage/etc. In total we got 9 books titled: Catch a Falling Star (pleasantly surprised- 1st edition book from 1949 in excellent condition), The Book of Goddess, Love for All Time, Sour Puss (get it- Cheshire Cat!?), Belladonna, Daughters of Fortune, Slovak-American Cookbook (you know, the cook in the story), Reader's Digest V2 1956 (just because it was pretty looking- bonus 1st edition book!), and Misery (my own little bit of humor). Did I mention the Bride is an avid reader and lover of Vintage?

Small colorful picture frames ($ section at Michael's) with black and white character pictures inside (printed at home)- courtesy of my mom.

A vintage flocked white rabbit (again my own personal stash).

3D Red hearts (my own stash)

Oversized flowers (purchased a small bunch, other we had laying around) with googly eyes (had those laying around, too) glued on (you know, like the talking/singing flowers in Alice).

Scored a cheap pink girl's alarm clock at Goodwill. Managed to take it apart and repurpose it into a pretty alarm clock. Super impressed with myself. All other materials I used, stickers/tea cup picture, I had in my craft stash.

I got lucky with this part- soon after we started planning, I went to the Dillards Outlet. Meandered in to the Home/Textile section and what do you know- 20+ Lavender cut-out flower/butterfly placemats! At just over a dollar each we picked them all up (except a few that weren't in good shape) and even a Pink one especially for the Bride.

My dad got me 2 decks of playing cards- these I scattered on the table and used for a game (see below).


Food:

Finger Foods appropriate for a Tea Party- little sammiches, fruit salads, teas,

I was fortunate enough to start this process around Spring/Easter and found great things on Clearance at Target (gotta shop smart!)... like Pink Lemonade cookie mix with Pink Icing and candy Bunny Ears/Faces for cookie/cupcake decoration.

I personally had Valentines things in storage- hello Red Heart Plates for serving trays!

I got lucky and found pretty pink/blue watercolor flower napkins on clearance at Target! Perfect!

I had cute little tags in my craft stash that I used to label the food, Inspired by the "Drink Me"/"Eat Me" in Alice.


Games/Prizes:

Of course we had to throw in some traditional shower games. I complied a Love Libs (Mad Libs- but Wedding Advice and Wishes) from others I found through Google searches. Printed individual sentences out on cardstock and once they were filled in, they went into a scrapbook we started.

And some non-traditional/themed games (narrowed down from a list of ideas):

Queen of Hearts- Inflate red and black balloons with playing cards inside. Guests pop balloons and whoever finds the Queen of Hearts card wins a prize!

"Change Places!" Randomly throughout, one of the Bridesmaids will yell this out and everyone relocates. At the end, whoever ends up with a Q of Heats playing card under their seat wins a prize!

Everyone votes on favorite hat and dress of the day. Prize awarded for each.

Favors:

Probably my favorite aspect of the shower! Every good party needs awesome favors! I decided on [mismatched] vintage tea cups/saucers. What a chore that was! Again, Goodwill/Salvation Army/Thrift Shops are your friend- don't be afraid to go often! I tried to keep them all similar size/shape and nothing TOO modern. If I found matching tea cups/saucers I broke up the set, so it was more MAD like Hatter would want it. Each cup had a small Rabbit/Cat Key charm tied with twine to the handle. These were great because they doubled as the actual cups for the drinks we served.

Other favor options were these amazingly pretty soaps!

Favors for the games included a heart bracelet, blue heart candy dishes, a green tin lunchbox with flowers, and a floral covered notebook.

Scrapbook table and prizes


Invitations/etc:

For the invitations- I made them! I started with this cute digital stamp from Hannah Lynn. Printed it, colored it and created the invitation around it.

One of the stipulations I included were that everyone must wear Tea Party attire and a fun hat! Being that the party was in Kentucky- I went in expecting Derby Hats. Me personally, I wore a Mad Hatter costume hat. The Bride herself played the part of Alice, frilly blue/white dress and all!


None of this would have been possible without an amazing support team! My mom, the bride's mom, the bride's aunt, and the bridesmaids! SO thank you to all who made it possible!

Have you thrown any crazy theme parties? DO share!! And I'll be back with more pics later.

Saturday, June 29, 2013

DIY make up applicator cleaner

S*%/$ about to get crazy! This is how I spend my Saturday nights. I decided to clean my make-up brushes. This is so easy, takes 5 minutes, and you'll have everything in the house! 

What you'll need:

Equal parts dish soap (for cleaning) and olive oil (for conditioning) 

A small dish

Paper towel


Swirl dirty brush in mixture and rinse off in water. Viola! Clean brush, just reshape and set to dry. The brush on the left is clean, the rest, well here's how it looks:

And the finished product:

Big difference!


Of course I'd like to point out that I used Seventh Generation dish soap and the candy corn colored make up pad is from Ollie's Boutique on Etsy! 

Do you have any fun home made recipes for cleaning?!?


You can also find the original tutorial here: http://www.homemademamas.net/2012/11/makeup-brush-makeover.html?m=1

Tuesday, March 5, 2013

Harry Potter Display

 
In case you don't know- I love the Harry Potter series! I have all the books and movies (blu-ray and digital copies). And I have two 'shrines' in the apartment. (this makes me sound a bit like a crazy stalker- not true). I had the good fortune of working at a movie theatre when the last 2 movies were released, so I snagged myself some goodies ;)
 
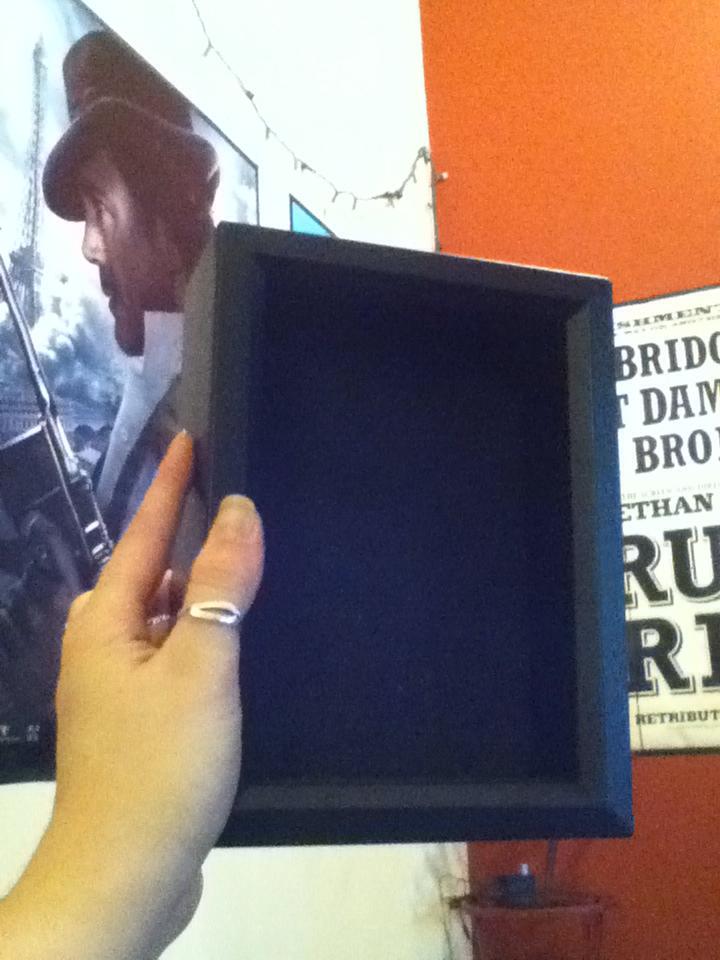
Somewhat recently, I made a Sorcerer's Stone shadow box. Target had these awesome Christmas ornaments that once I saw it in the after Christmas clearance, I knew immediately I wanted to make something with it- it was just too perfect! So to make your own here's what you need and how to make this super easy shadow box (I'm sure you can apply the idea to many other things!):
 
-One ornament/item you want to display
-One shadow box (deep enough to hold said ornament- I purchased mine at Michael's either on sale or with a coupon for less than $5!)
-Pliers (to aid in removing the top of the ornament)
-Double sided tape/Velcro/strong glue dots
-scrap scrap booking paper
-pen
 
Here it is:
 
 I popped the top right off, it was only plastic:
 

I removed the glass from the shadow box frame, with the glass in, the 'stone' wouldn't fit
 
Originally I thought I might want to put some scrapbook paper in the background, but it was a nice flocked material in the back so I decided it was good without. The shadow box actually came with Velcro! So I placed one side of the strip where I wanted the stone to sit inside the box, and the other piece on the back side of the stone (I added glue dots because the sticky side of the Velcro wasn't enough to hold it in place). The great thing about the shadow box is that you can't see the top of the ornament, so that extra plastic bit on top is well hidden! I then cut a small piece of scrapbook paper and labeled my artifact. =) 


Here, you can see it on the wall with my other Harry Potter things- including an artist rendition of Hogwarts I got at Mega*Con, a Make Love not Horcruxes pottery piece I made, and my friend Kate's drawing of Dumbledore (hes so adorable!!! and SHE will be at Mega*Con in Orlando this month). Below is my theatre swag (including HP 3D glasses still in the bag), my Sirius Black wand from IoA, and Keep Calm and Harry On reminder ;)


Well, I hope you all enjoyed today's tutorial! Coming soon- I tell you about my adventures in sewing!

In the meantime- tell me in the comments if you have a crafty nerdy thing you've done recently!

Thursday, January 24, 2013

The Best Granola Bars EVER

Due to popular demand, here is my secret recipe for Home Made Granola Bars. There are other ingredient options but these are the ones that I use!
 
Ingredients:    
1 2/3 cups quick rolled oats
1/3 cup wheat flour*
1/2 teaspoon salt
1/4 teaspoon cinnamon
1/2 10oz bag of dark choc. chips**
1/3 cup organic peanut butter***
1 teaspoon pure vanilla extract
1 tablespoon water
1/2 cup agave nectar ****
 
Directions:
Preheat oven to 350 degrees. In a large bowl, combine the rolled oats, flour, salt, cinnamon, and dried fruit/nut/choc mix. Add the organic peanut butter, vanilla extract, water, and agave nectar. Stir with a spatula until the entire mixture is well combined. This takes some muscle.
Spray Scr*w that, use muffin tin liners! Spoon into muffin tins.  Now, this is an important step: press the granola into the pan. Bake for 15-20min or until edges have browned. Let cool on counter until you can place in the fridge for 1-2hrs. Once cooled, pop them out from the muffin tin with a spoon.
Store in airtight container and enjoy! =D
 
*original recipe called for oat flour which is just too much work when regular flour substitutes just fine!

**feel free to experiement here, if you like dried fruit use 2-3 cups, if you like Andes Mints try the Andes Mint Chips. The possibilities are endless! Mix and match- have fun. For some add-ins, 3 cups may be too much.

***I havent done this myself, but the original recipe said you can substitue for any other nut butter

****Original recipe said honey or corn syrup worked as well

Let me know in the comments what kind of success you have with this! The best part about them is they are healthy and OH SO filling!!