Over the past few days, I've been pondering what a giant GEEK I have become and nerd/geek culture. How did we get here? I remember in high school, I thought my brother was so dorky (sorry, bro) and I was too self-involved to really care about any of it. I was busy trying to be cool but not so cool that I was accepted into the popular crowd. But lets be honest- I've had it in me all along. I love to read. And I was in color guard in high school- that's like being an honorary band geek! So really, I was just kidding myself into thinking that WAS NOT me.
Last year, I took my first road trip to Dragon*Con- I'm feeling a strong desire to be back there again this year, sadly its not in the cards for me as that dorky brother of mine is getting married. This year, I have spent 2 days at Disney in a months time. I'm going to a Rays game- for the sole fact that its Star Trek night! And I paid $20 to see Iron Man 3 in 3d/IMAX!! Who does that?! (Apparently, a lot of you do as well). Don't ask me how many books I've finished already this year, either.
The great thing about being a geek is you make the definition of what being a Geek means to you! Whether it be comic books, video games, games, movies, anime, books, or any combination of these. And you don't have to understand all of them to be accepted into the geek community. Just weak your geek flag with pride and you'll be fine!
For me, I don't understand Dungeons and Dragons. (But I dated someone who loved it and I watched him and his friends play.) Or any of those types of games for that matter. I. just. don't. get. it.
What I will do---- I will play Apples to Apples, Cards Against Humanity, or Journey until you hate it.
I have a love for Dr. Horrible, Chuck, Sherlock, Being Human US, and... Dr. Who! And let me tell you, I'm ready for the Doctor to come find me ;) What was I so afraid of- these are hot guys ready to save the world and/or us girls! Please don't mind the drool in the keyboard. (For all you feminists ready to holler that girls can save themselves- I am fully aware because ERMAGHERD did you see how bad A Pepper Potts is now?!!?!)
I read fantasy books- All. The. Time. Serious book worm right here, guys. I've never been afraid to admit that- but sometimes its like an addiction. I feel like if I walk away from a book I'm going to miss something! Its a little mental, I know; but I also know- some of you are thinking the exact same thing.
I suppose part of this was inspired by The Militant Baker- she talks about self love and acceptance. Which I think I took something away from that and it opened up these other aspects.
So, in conclusion of tonight's little soap box meeting: Be yourself and be proud. Haters gonna hate. Or something.
Do you have something in your life that makes you who you are but took you a while to accept? Tell us!
Wednesday, May 8, 2013

Tuesday, March 19, 2013
Mini Vacation- OTown Bound
We'll get back to a somewhat regular blog next week as I took a mini vacation this week. I will leave you with some pictures from Orlando until then (no I did not go to Mega*Con this time).

Downtown Street view

Leu Gardens Flower

Leu Gardens Flower

Creative use of promoting healthy eating!
What have you been up to this week?!
Tuesday, March 12, 2013
Fun (?) With Sewing
Fun is the operative word- it has yet to be determined if this is considered a fun activity. My first REAL project on the sewing machine was a relatively easy one (one I got the machine working- user error people. Gets me every time). T-shirt pillows are a GREAT starter project if you don't have a lot of sewing experience. This is more advanced than my previous t-shirt pillow project- Got Blood? I've done a few before, by hand, and that just takes a looooong time.

Here's what you need:
-Sewing machine and needle/thread of appropriate color to your shirt
-An old Tshirt you just cant bring yourself to throw away
-Scissors
-Pillow insert of approximate size to your tshirt (Ikea has them for pretty cheap)
The t-shirt I chose was a Star Trek shirt that just fit weird and was a weird material (probably not the greatest for sewing).
Lets make it so!
I cut the sleeves off on either side along the seam. If you're shirt is a V-neck like mine you want to save those scraps! And before you do anything else you will need to hand sew a scrap into the v-neck so you don't have a weird hole in your pillow:
Lets make it so!
I cut the sleeves off on either side along the seam. If you're shirt is a V-neck like mine you want to save those scraps! And before you do anything else you will need to hand sew a scrap into the v-neck so you don't have a weird hole in your pillow:

(inside out and finished with the hand sewing)

Keeping your tshirt turned inside out (or if you need to feel good about your progress- turn it right-side out and have a look- GOOD JOB YOU!), lay it on top of the pillow insert and use pins to mark the width. If your pillow insert is exactly as wide as your shirt, good for you. Now you just need to sew a straight line along either side of the pillow, like so:

(I didn't go alll the way down the sides of my shirt as my inset was not that long, I went just a little farther than the length of my pillow)
On the bottom edge you DO NOT want to stitch all the way across with the machine otherwise you'll have an inside out non-tshirt-pillow pillow. No fun. Depending on how squishy your pillow insert is, sew far enough in on both sides to where you have a hole in the middle to stuff the sucker in. Once you think you've sewn far enough, carefully turn your shirt right side out again. Insert pillow and hand stitch closed.


TA DA- not the prettiest, but it works for me.
My t-shirt pillow is incredibly soft and squishy. It sits proudly on my sofa and I enjoy lounging on it often.
Tell me- have you made a tshirt pillow before? Any cool ideas or tips and tricks?
Tuesday, March 5, 2013
Harry Potter Display
In case you don't know- I love the Harry Potter series! I have all the books and movies (blu-ray and digital copies). And I have two 'shrines' in the apartment. (this makes me sound a bit like a crazy stalker- not true). I had the good fortune of working at a movie theatre when the last 2 movies were released, so I snagged myself some goodies ;)
Somewhat recently, I made a Sorcerer's Stone shadow box. Target had these awesome Christmas ornaments that once I saw it in the after Christmas clearance, I knew immediately I wanted to make something with it- it was just too perfect! So to make your own here's what you need and how to make this super easy shadow box (I'm sure you can apply the idea to many other things!):
-One ornament/item you want to display
-One shadow box (deep enough to hold said ornament- I purchased mine at Michael's either on sale or with a coupon for less than $5!)
-Pliers (to aid in removing the top of the ornament)
-Double sided tape/Velcro/strong glue dots
-scrap scrap booking paper
-pen
Here it is:

I popped the top right off, it was only plastic:

I removed the glass from the shadow box frame, with the glass in, the 'stone' wouldn't fit
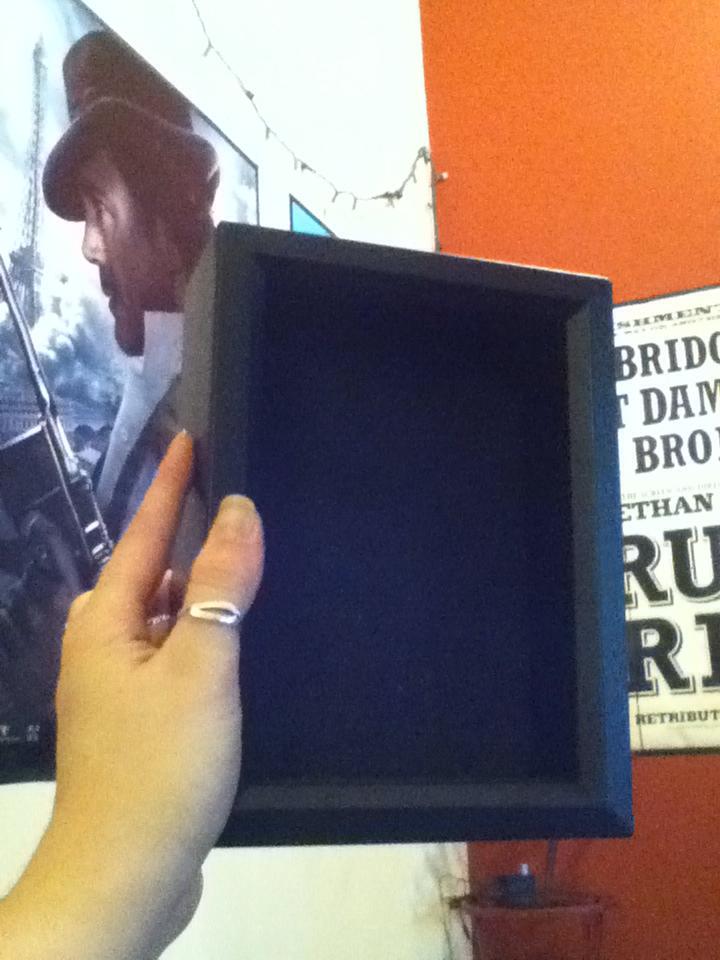
Originally I thought I might want to put some scrapbook paper in the background, but it was a nice flocked material in the back so I decided it was good without. The shadow box actually came with Velcro! So I placed one side of the strip where I wanted the stone to sit inside the box, and the other piece on the back side of the stone (I added glue dots because the sticky side of the Velcro wasn't enough to hold it in place). The great thing about the shadow box is that you can't see the top of the ornament, so that extra plastic bit on top is well hidden! I then cut a small piece of scrapbook paper and labeled my artifact. =)


Here, you can see it on the wall with my other Harry Potter things- including an artist rendition of Hogwarts I got at Mega*Con, a Make Love not Horcruxes pottery piece I made, and my friend Kate's drawing of Dumbledore (hes so adorable!!! and SHE will be at Mega*Con in Orlando this month). Below is my theatre swag (including HP 3D glasses still in the bag), my Sirius Black wand from IoA, and Keep Calm and Harry On reminder ;)


Well, I hope you all enjoyed today's tutorial! Coming soon- I tell you about my adventures in sewing!
In the meantime- tell me in the comments if you have a crafty nerdy thing you've done recently!
Monday, February 25, 2013
Fun in the Kitchen- gummy style
Today I decided to tackle another of my homemade projects. I enjoy gummy snacks and have been searching tirelessly for a recipe. Based off what is in my (currently collapsing) pantry, this is what I used:
3 envelopes plain gelatin
1/2 package of sugar free jello
1/4 cup water
Mix in small sauce pan until the consistency looks like dough. Heat over medium heat til melted. Pour into mold and place in freezer for 10 min or until solid.
This concoction filled one tray of small molds I purchased at Michaels ages ago for $2.
In the end, they are gummier than the store bought kind, but very flavorful! And i could polish off this tray in one sitting. must. pace. myself. I would really like to find a recipe that uses fruit juice instead of jello!
Let me know in the comments if you try them or have your own recipe!!


3 envelopes plain gelatin
1/2 package of sugar free jello
1/4 cup water
Mix in small sauce pan until the consistency looks like dough. Heat over medium heat til melted. Pour into mold and place in freezer for 10 min or until solid.
This concoction filled one tray of small molds I purchased at Michaels ages ago for $2.
In the end, they are gummier than the store bought kind, but very flavorful! And i could polish off this tray in one sitting. must. pace. myself. I would really like to find a recipe that uses fruit juice instead of jello!
Let me know in the comments if you try them or have your own recipe!!
Tuesday, February 19, 2013
Soapmaking 102
Remember my dismal attempt at making soap some months (*ahemyears*) back? Yea, this time I got with a professional. I took my mom with for moral support, actually it was her birthday and I had Groupons for a soap making class at Milagros in Hyde Park. Let me just say, the results were drastically different. However, I don't want to use my soap now! Its just too pretty! Oh and it smells good too! Check them out on Facebook: http://www.facebook.com/MilagrosTampa


***~~my soaps ARE all gone now, almost as funt o use as they were to make/buy!~~***
Reclaimed and Relaxed
Many months ago my parents neighbors had two nice wood bookshelves on the corner ready for the trash! Much to my mother's dismay- I SAW THEM FIIIIRST! ha One bookshelf was in good condition to use as a bookshelf. The other was sorely in need of some TLC. Since we didn't need TWO bookshelves and my dad had the presence of mind to save the best pieces for spare parts and what have you, I decided, in the end, to make it into something new.
(I apologize in advance for the poor quality pictures- as with all great ideas, the thought to actually take pictures never happens until halfway through the process when its inconvenient to go grab an actual camera!)
Here you can see the 'end' result. A lovely new foot rest! YAY! I am a crafter, and therefore a horder, and I do not want to admit how long I've had this fabric tucked away for. I will admit by the time I went out and got supplies and actually made this... it took nearly a month.

Heres what you will need to make your own:
-A spare bookshelf ;)
-The very top piece
-the 4 feet- keep the screws!
-A screw driver
-Batting material- as much as you would like
-Enough fabric to cover the top
-small nails and a hammer
OR a staple gun (probably the easier method)
First, we took the top of the bookshelf and screwed to the bottom of it on all four corners. This was surprisingly easy, even without power tools. Then I strategically layed out the cushioning on the top, so it fit just so and was nice and padded (I didn't measure before buying it tho, and to be honest I should have bought more). Once I had it all laid out, I carefully flipped it back over and with the small nails tacked it in place. From there, we secured it all around with more small nails. I was careful not to use too many for this step, since the fabric still needed to be secured over this.


Its been nearly finished for months now, the only thing missing is i thought it would be a nice touch to add some 'fringe' around it to better hide those loose ends. Sadly, I haven't found anything that will look right. But hey, I'm still pleased with the end result considering I've never done any uphostery or carpentry like this before! Also, it helps to have a handy man in your life. <3
Tell me- have you salvaged anything from the trash to turn it into something completely new?!
Now pardon me, while I enjoy the fruits of our labor.
(I apologize in advance for the poor quality pictures- as with all great ideas, the thought to actually take pictures never happens until halfway through the process when its inconvenient to go grab an actual camera!)
Here you can see the 'end' result. A lovely new foot rest! YAY! I am a crafter, and therefore a horder, and I do not want to admit how long I've had this fabric tucked away for. I will admit by the time I went out and got supplies and actually made this... it took nearly a month.

Heres what you will need to make your own:
-A spare bookshelf ;)
-The very top piece
-the 4 feet- keep the screws!
-A screw driver
-Batting material- as much as you would like
-Enough fabric to cover the top
-small nails and a hammer
OR a staple gun (probably the easier method)
First, we took the top of the bookshelf and screwed to the bottom of it on all four corners. This was surprisingly easy, even without power tools. Then I strategically layed out the cushioning on the top, so it fit just so and was nice and padded (I didn't measure before buying it tho, and to be honest I should have bought more). Once I had it all laid out, I carefully flipped it back over and with the small nails tacked it in place. From there, we secured it all around with more small nails. I was careful not to use too many for this step, since the fabric still needed to be secured over this.


Once I was reasonably sure the cushion was in place I measured and cut my fabric. I folded it over the edges of the cushion underneath so the batting would not show. Here, I went crazy with the small nails- I wanted to be sure it would withstand being sat on and kicked during daily use.

Its been nearly finished for months now, the only thing missing is i thought it would be a nice touch to add some 'fringe' around it to better hide those loose ends. Sadly, I haven't found anything that will look right. But hey, I'm still pleased with the end result considering I've never done any uphostery or carpentry like this before! Also, it helps to have a handy man in your life. <3
Tell me- have you salvaged anything from the trash to turn it into something completely new?!
Now pardon me, while I enjoy the fruits of our labor.
Subscribe to:
Posts (Atom)